Screens
|
|
|
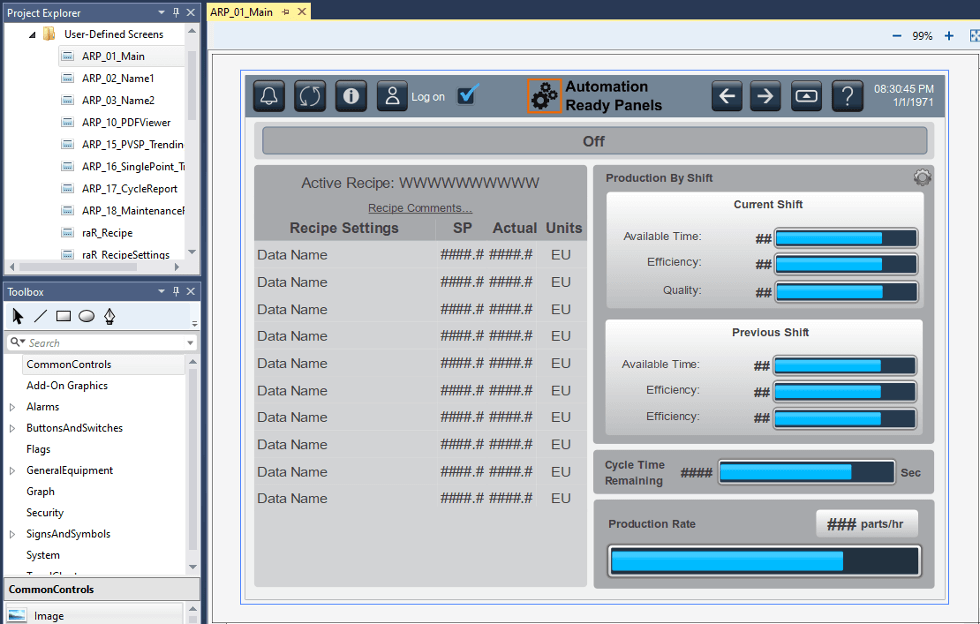
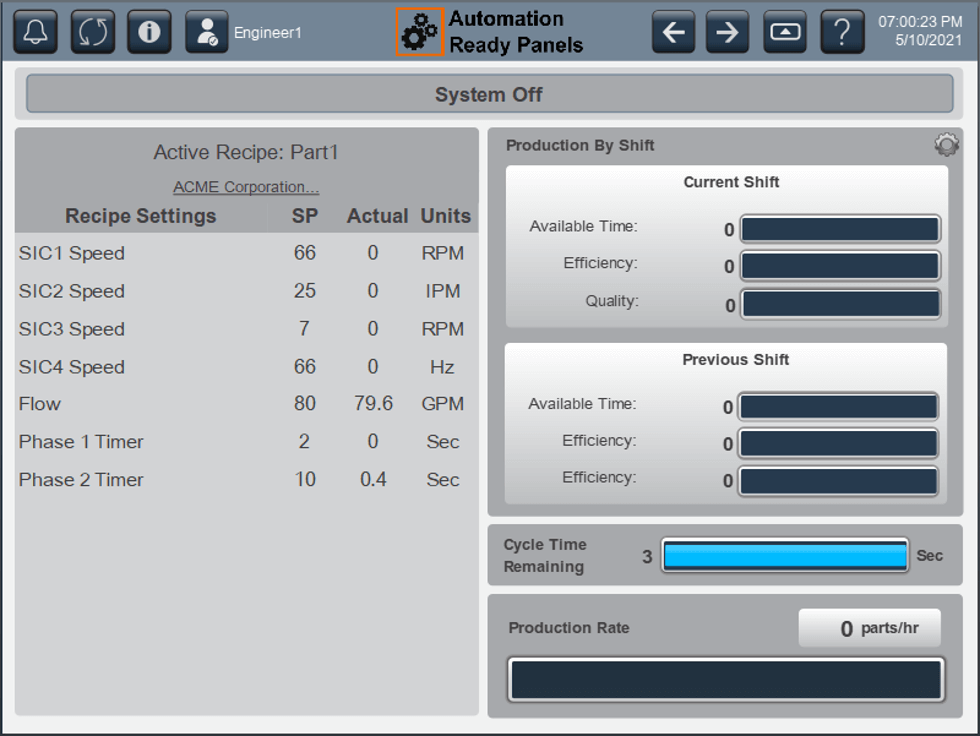
The HMI project includes several pre-made displays to use immediately. A description of the screens are: Main: The home screen of the HMI. This screen has many options on the title bar at the top and rich operational data in the main portion of the display.
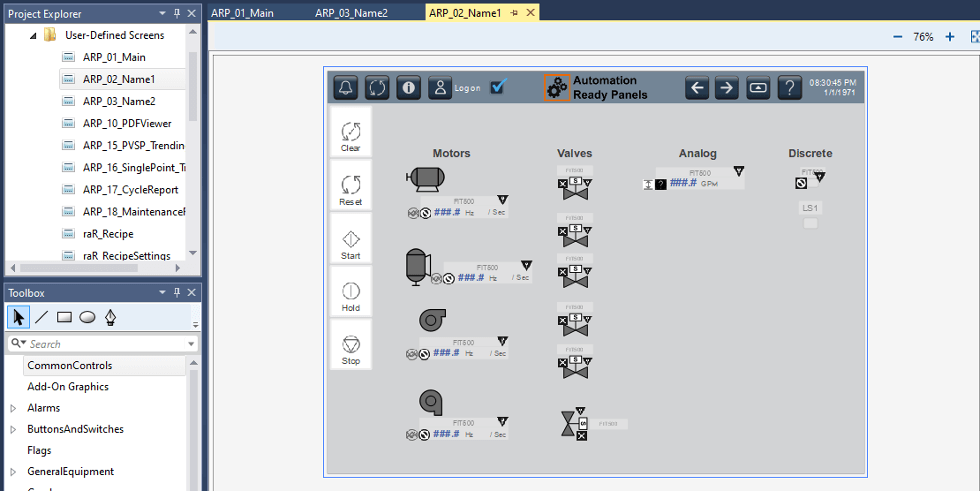
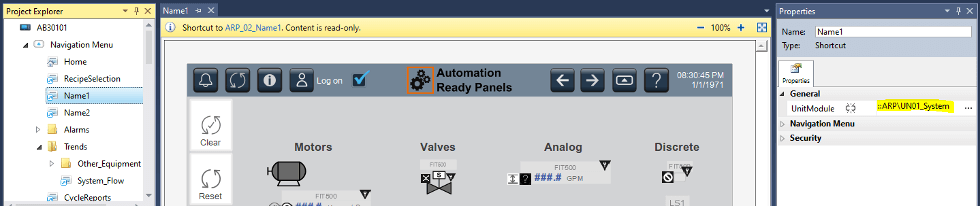
Name1: The Name1 Equipment Module Detail and Unit Module Controls screen. This screen is used to draw the machine or process in more detail, showing devices and other items. The device objects are already drawn have links in them for device popups. The left control buttons are used to operate the entire system (the UN01 State Machine). This display can be duplicated for more Equipment Module Detail screens as needed. To call the screen correctly and link it to the Unit Module, the navigation button needs to have the reference in it (shown below).
PDFViewer: This display views any PDFs added to the HMI project for viewing. Documents normally included are Rockwell Automation manuals, electrical drawings, and this manual. This display is reusable by assigning the document name to the navigation button as shown below.
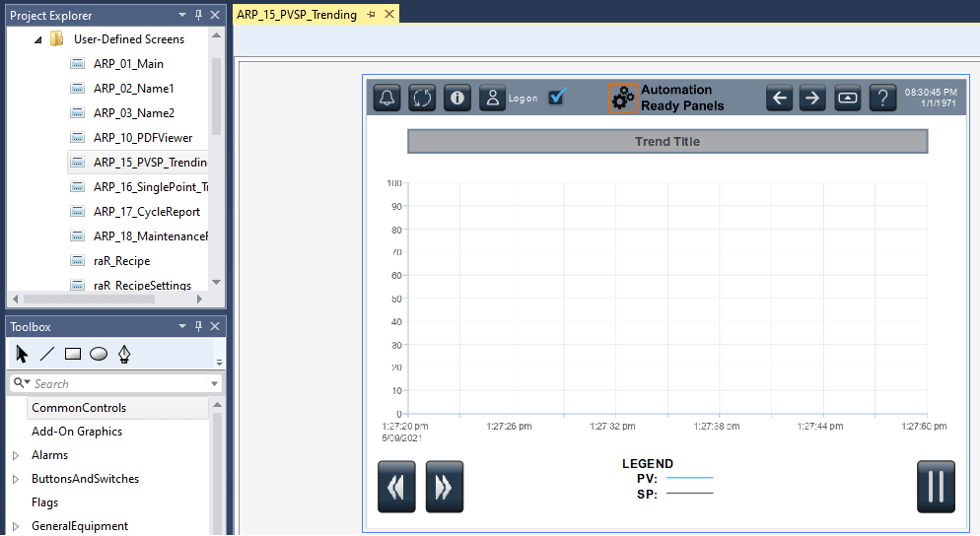
PVSP_Trending: This trend is used for comparing and monitoring two values, the process setpoint and the process variable. It can be reused by adding the tags to monitor to the navigation button. The same applies to the SinglePoint_Trending display.
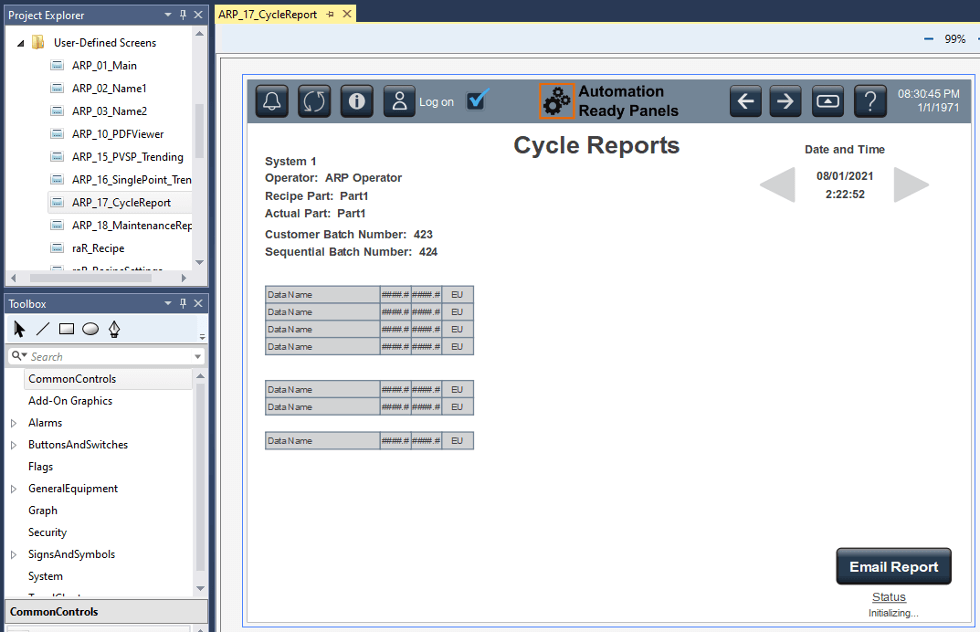
Cycle Reports: The Cycle Reports screen. A new report can be generated every so often or at the end of a cycle. More data and charts can be added at will to this screen that are important to verify correct operations of the system while creating product or executing process. The arrows can be used to scroll back to previous reports. The Email Report button at the bottom can be used to send the text in the report to an email address if desired (an email account and settings are required to enable this feature). This information applies to the Maintenance Report screen as well.
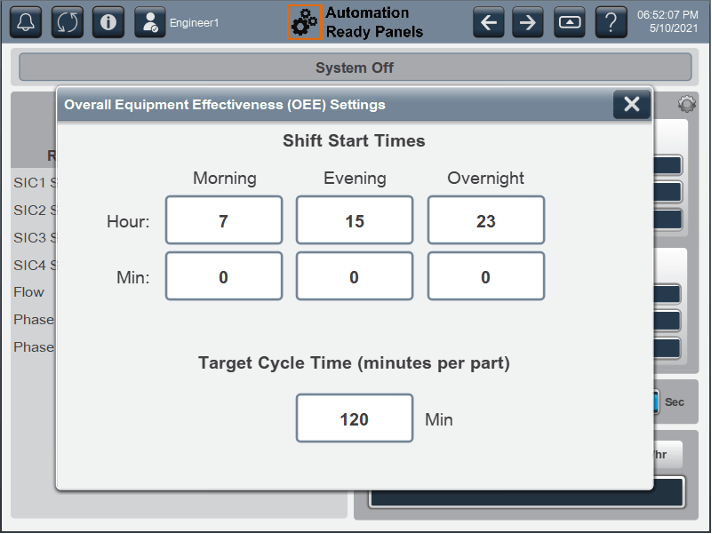
Below is a description of the screens that do not usually require programming changes. OEE Setup: Set the shift change information and the theoretical production rate. Press the highlighted gears icon on the right of the home page.
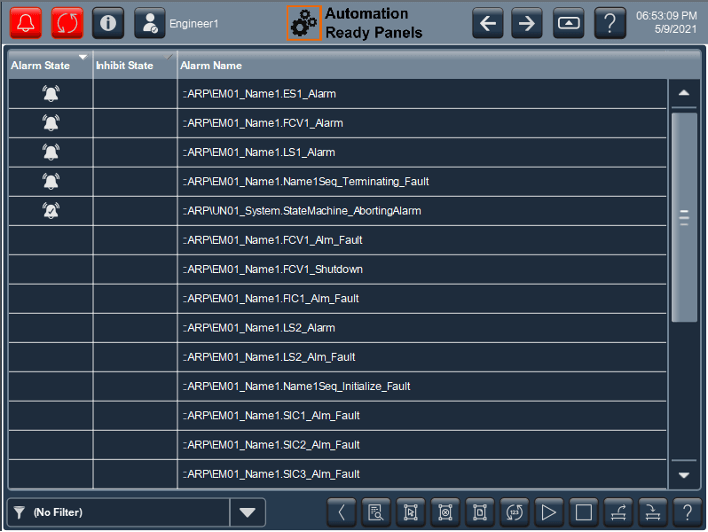
Alarm Summary: Shows the currently active alarms. This list can be sorted and filtered as desired. Pressing the alarm bell in the upper left corner will open this display.
Alarms Manager: Shows a list of all the alarms programmed in the PLC. Options to manage system alarms are on this display. This can be found in the navigation menu under Alarms.
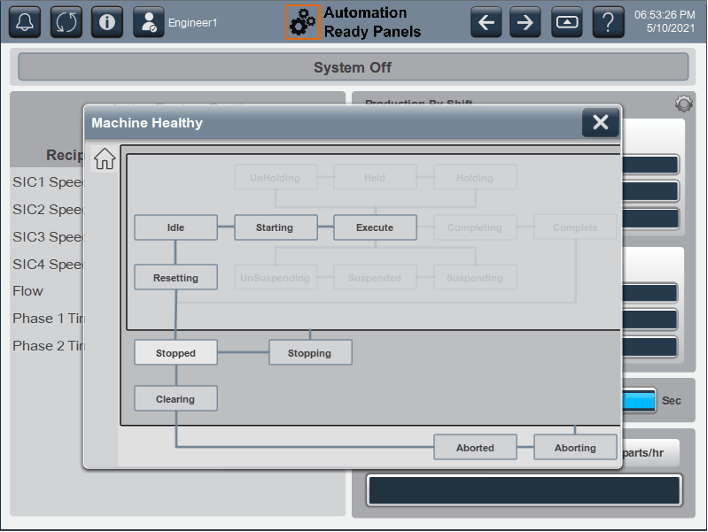
Unit Module State Machine Status: Shows the status of the state machine and the main sequencer. Pressing the “i” icon in the title bar will open this popup.
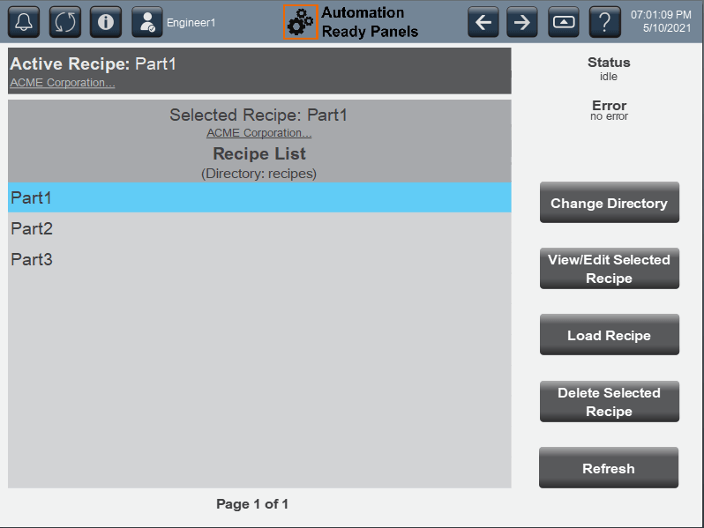
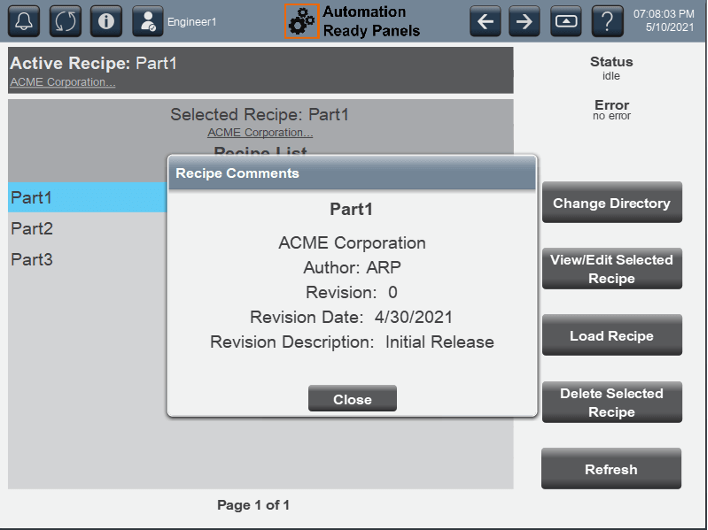
Recipe: Shows all the machine or process recipes saved on the SD card in the PLC. These recipes contain the setup values that change per process or part. Change Directory allows the user to browse the SD card directory. View/Edit Selected Recipe allows changes to be made to the highlighted recipe on the left. Load Recipe loads the recipe from the SD card to the PLC (the recipe is not active unless the state machine control reset button is pressed). Delete Selected Recipe deletes the recipe from the SD card. Refresh re-scans the SD card for new excel files. Note: Tapping the description under the Selected Part name on the left shows a revision description of the recipe (shown below)
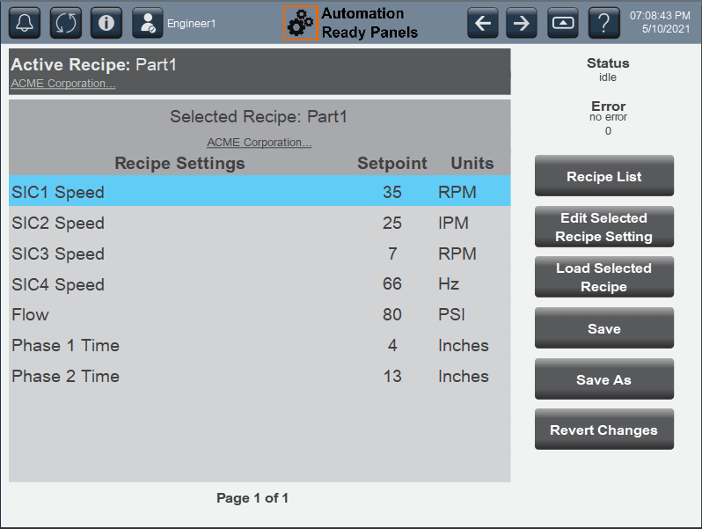
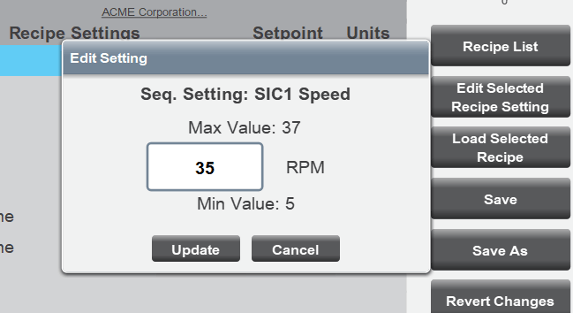
Recipe Edit: Pressing View/Edit Selected Recipe above brings up a screen which allows changing of the parameters of the machine for each process/part recipe. Highlight the parameter that needs to be changed and press Edit Selected Recipe Setting. When finished, press Save. If the recipe is ready to be active, press Load Selected Recipe. Save As allows a copy of the currently programmed recipe as a new recipe.
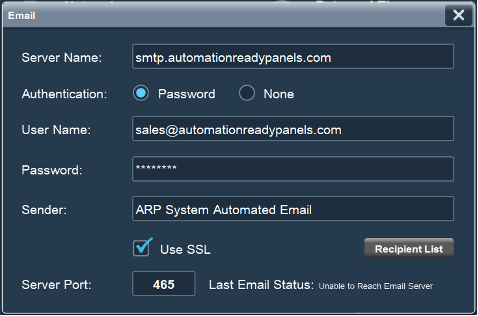
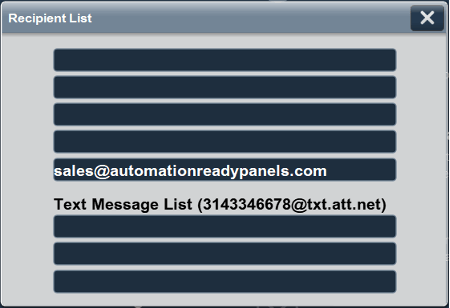
Email and Text Message Recipients: To add or change email or text message recipients, open the settings screen, the click the Email button, then Recipients List button (as shown below).
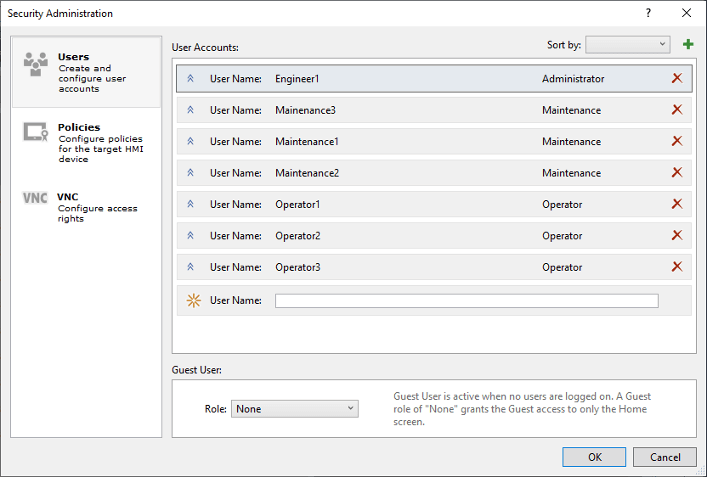
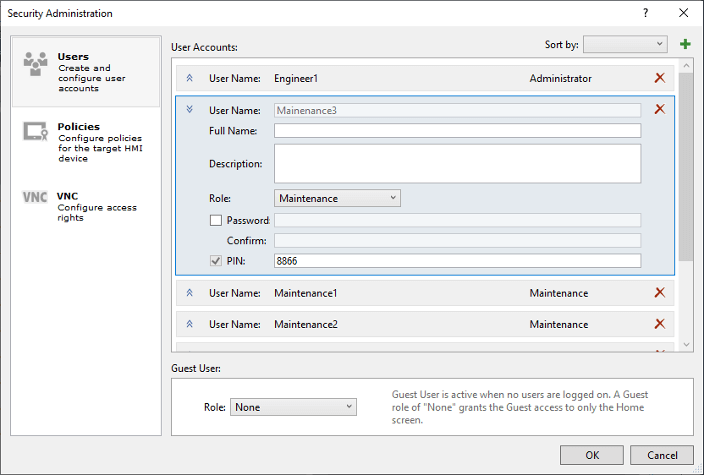
HMI Security: There are default users and pins assigned in the HMI. The user should consider changing these as these are the names logged in cycle reports.
|